Team management is crucial - whether you're working from home or office.
When it comes to design, ineffective team management and miscommunication could be a disaster.
In this video, I'll show you how to manage disparate designs across teams, projects, and clients using workspaces.
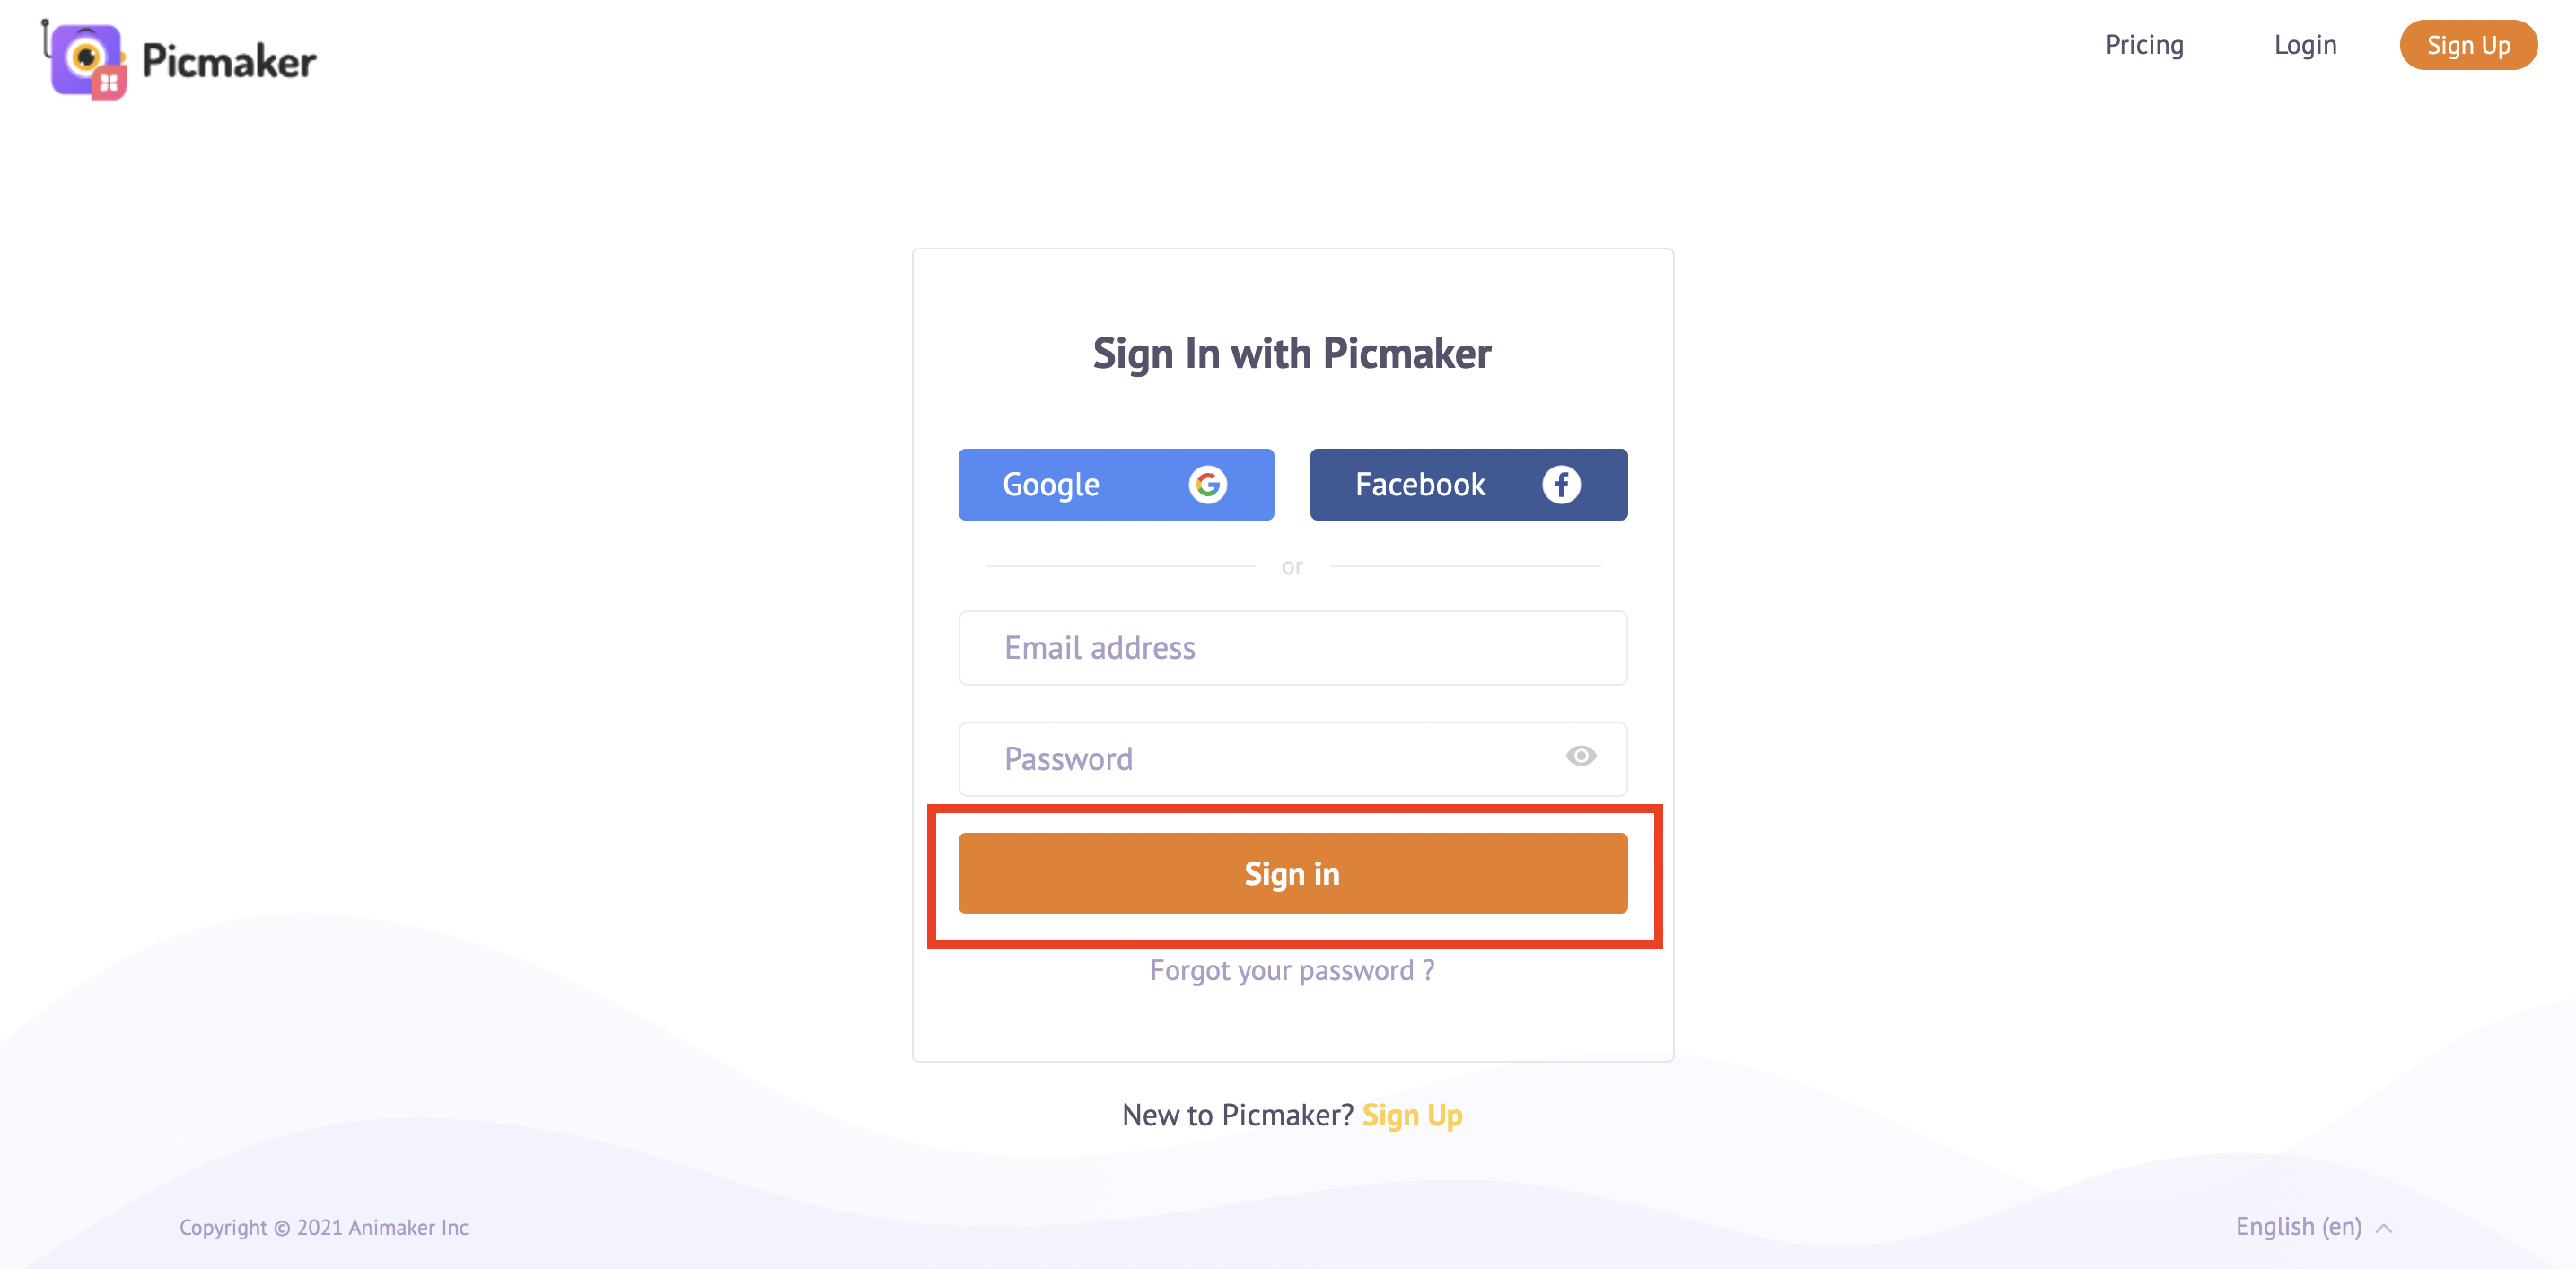
Signin
For this tutorial, we’ll use a do-it-yourself design software called Picmaker, which allows you to create stunning designs in minutes.
Sign in or sign up to Picmaker using your credentials.
Picmaker Workspaces
Picmaker workspaces offer a fast, reliable, and secure way for you to work on multiple projects with different design teams.
In the dashboard, head to the sidebar and click on my workspace.
From here you can invite your team members.
Just type in their email id and assign roles like member or admin.
Team Roles
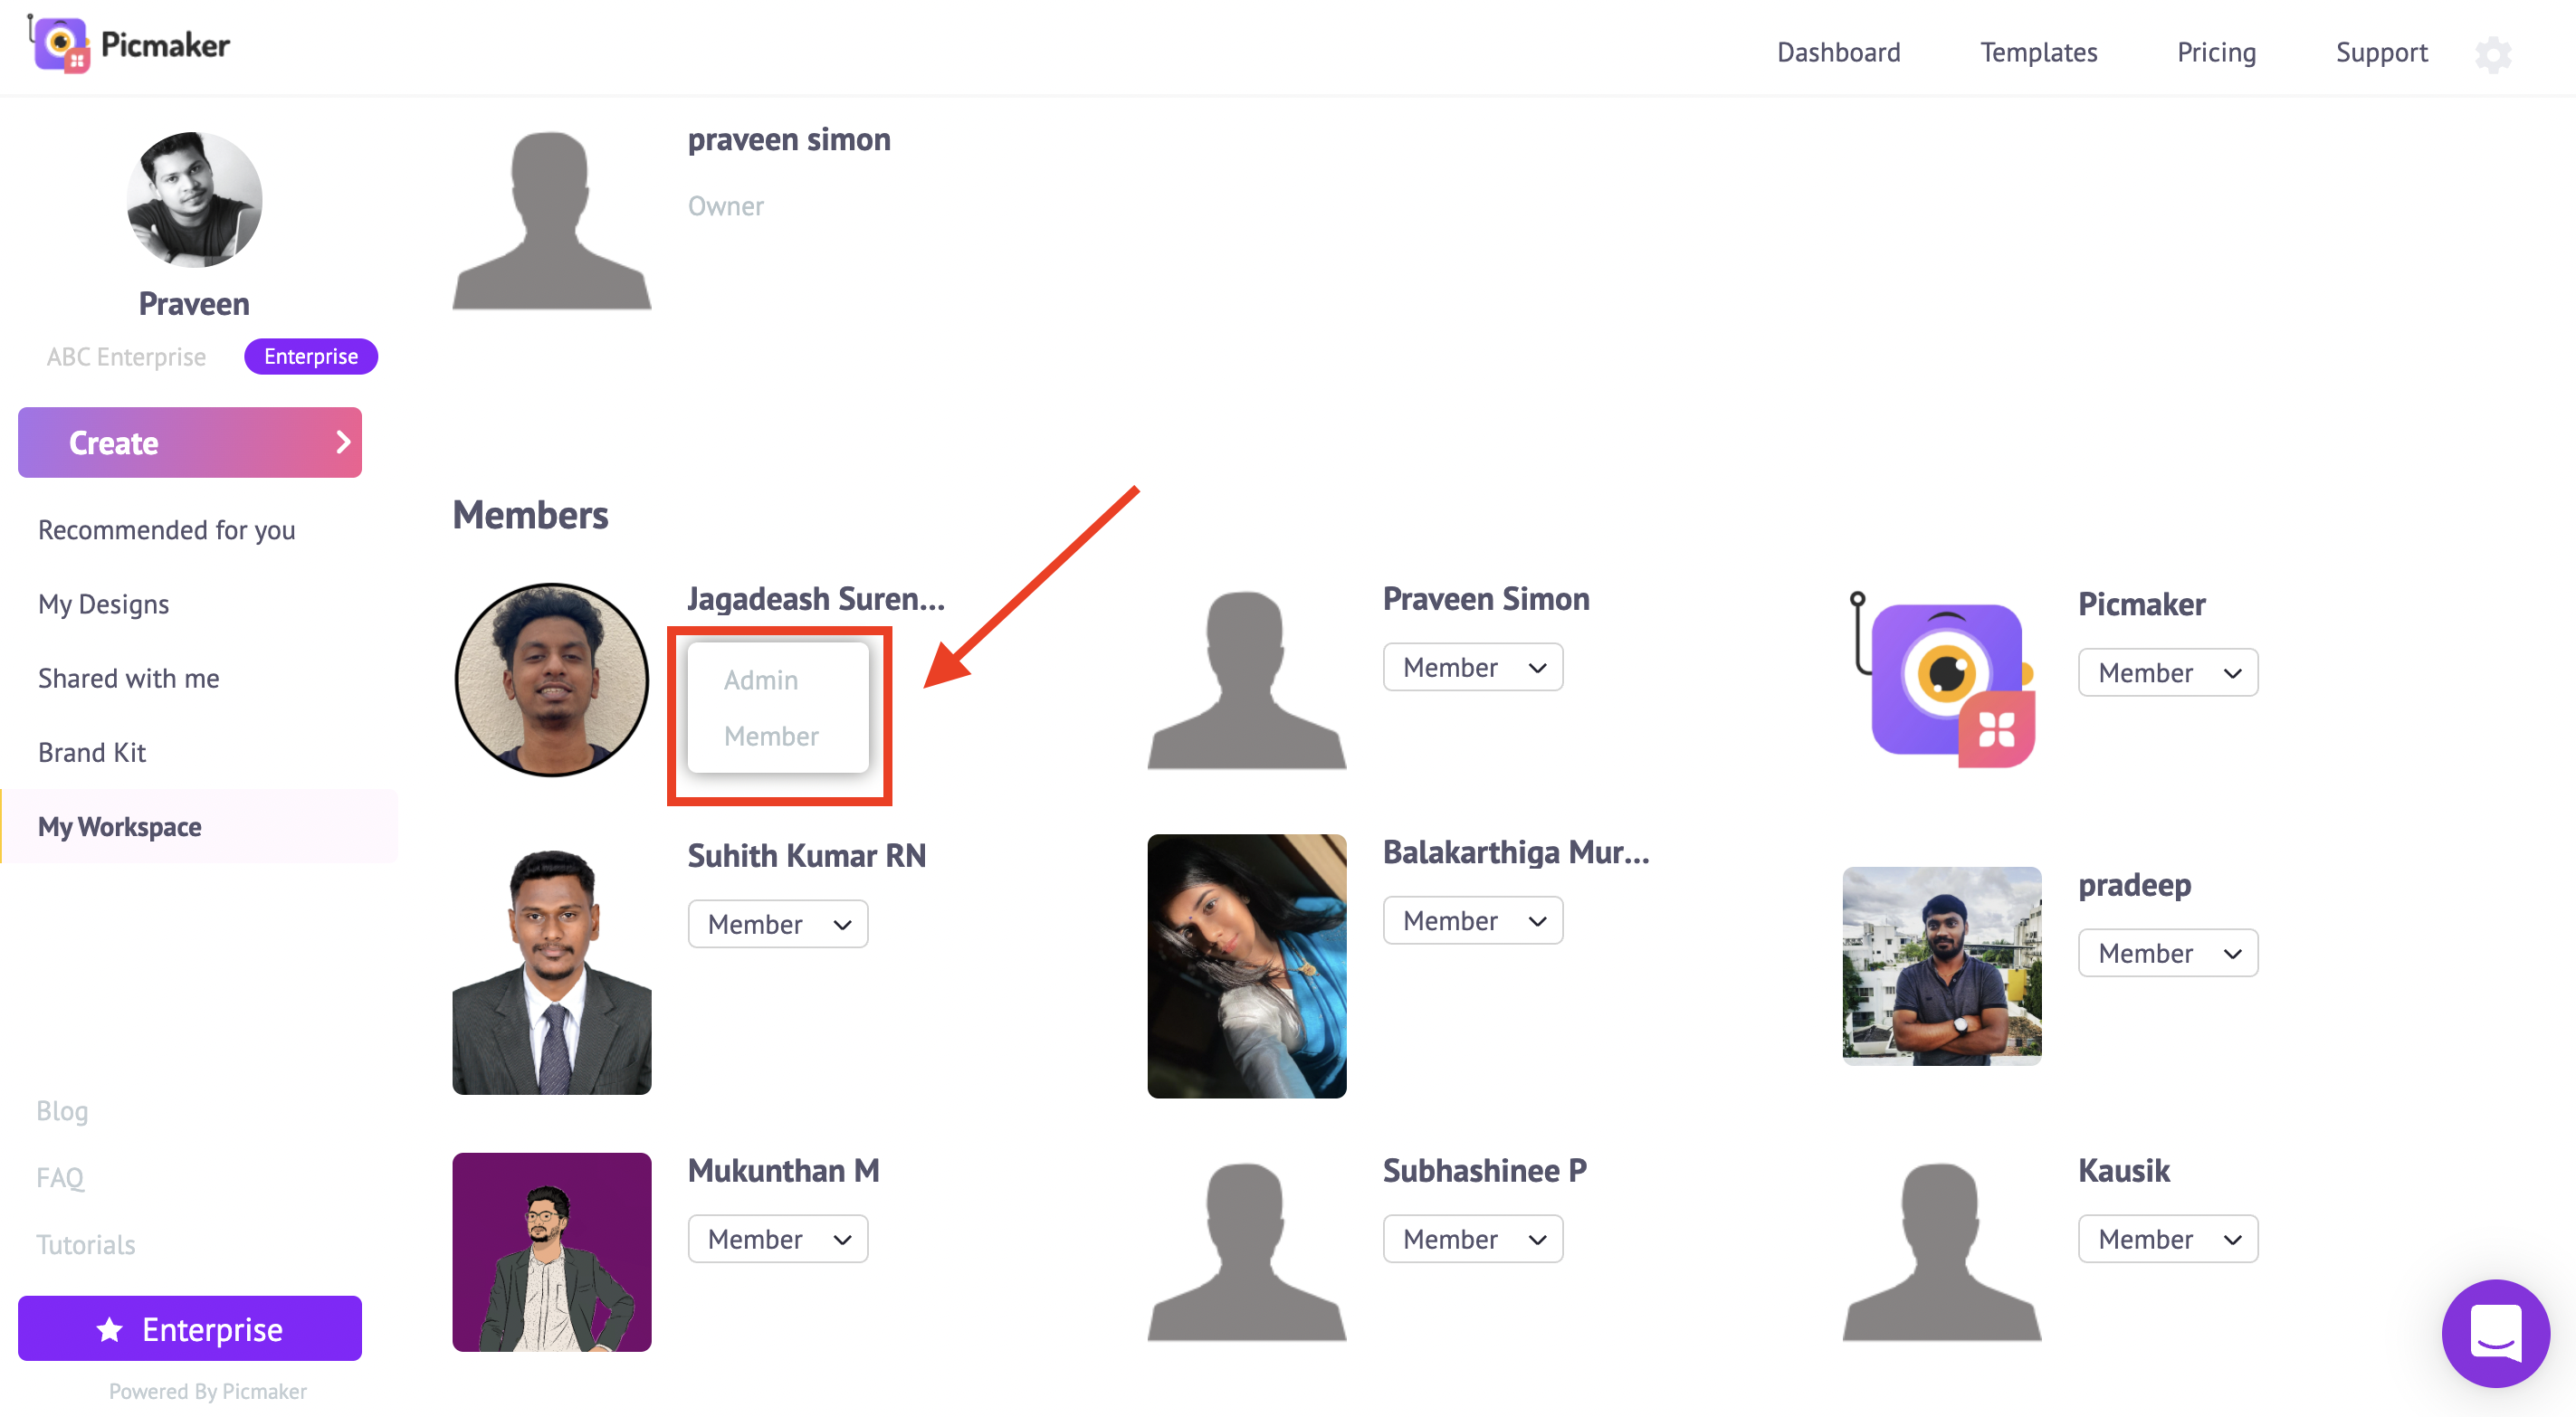
An admin can add a team member, access your brand kit and add or remove logos, templates, and fonts.
A member can edit and view your shared designs.
That's not all.
If you are in starter or pro plan and want to invite your team, you need to upgrade their account to starter or pro plan to access the workspace
With that, they get access to your components such as premium templates, pictures, brand kits, icons,, and objects that are a part of your subscription plan.
So, your whole team will get the combined benefits of paid features.
For instance, you get 50 premium images per month in the pro plan. After inviting a team member, you both can access the 50+50 which is 100 premium image credits.
Share designs with the team
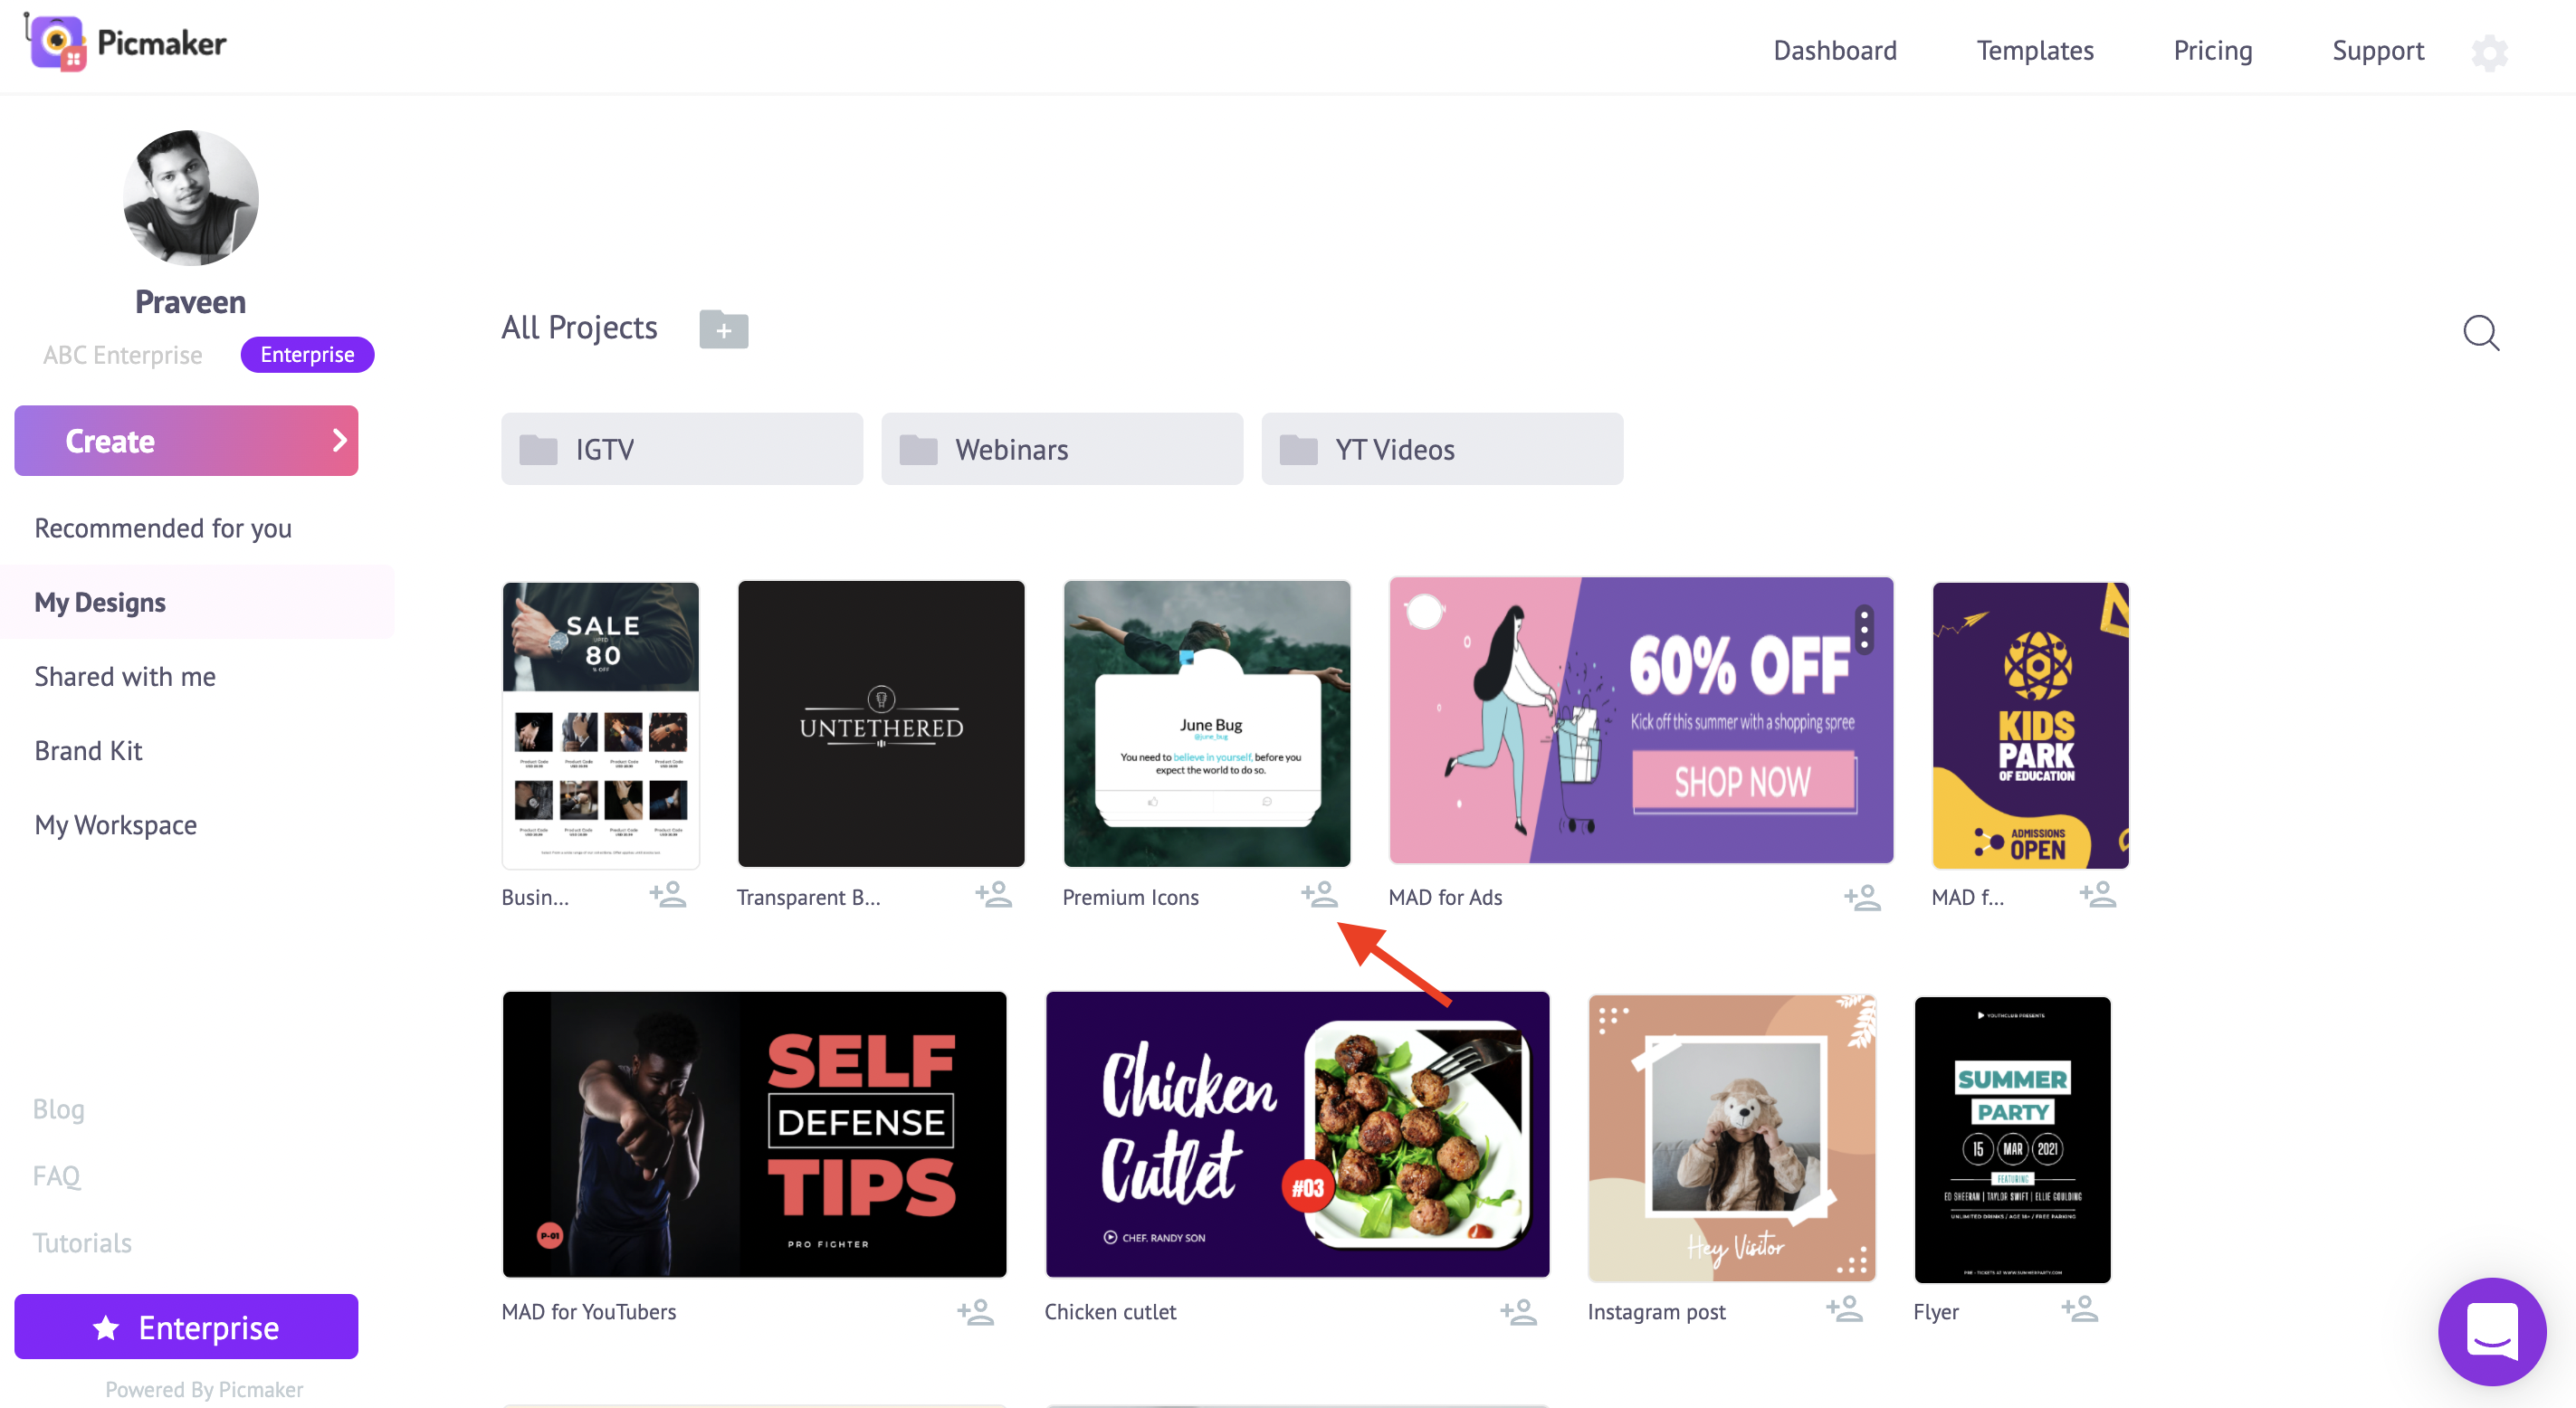
To share designs with your team, click on "My Designs" on the sidebar.
Here you can see all your designs in the selected workspace at a glance.
You can either share individual designs or share an entire folder.
Click on the icon at the bottom right of a design.
Key in your teammate's email id.
You can choose either you want them to just view or edit the design.
Likewise, to share a folder, click on the 3 dots on the right side of a folder.
Select share.
Just like how we did to share individual designs, enter the email id and send it to them.
The beauty of workspace is when you share a design, it will be added under the "Shared with me" section of the same workspace you and your teammate are sharing with each other.
This lets you create and organize separate workspaces for different projects and clients.
Create a new workspace
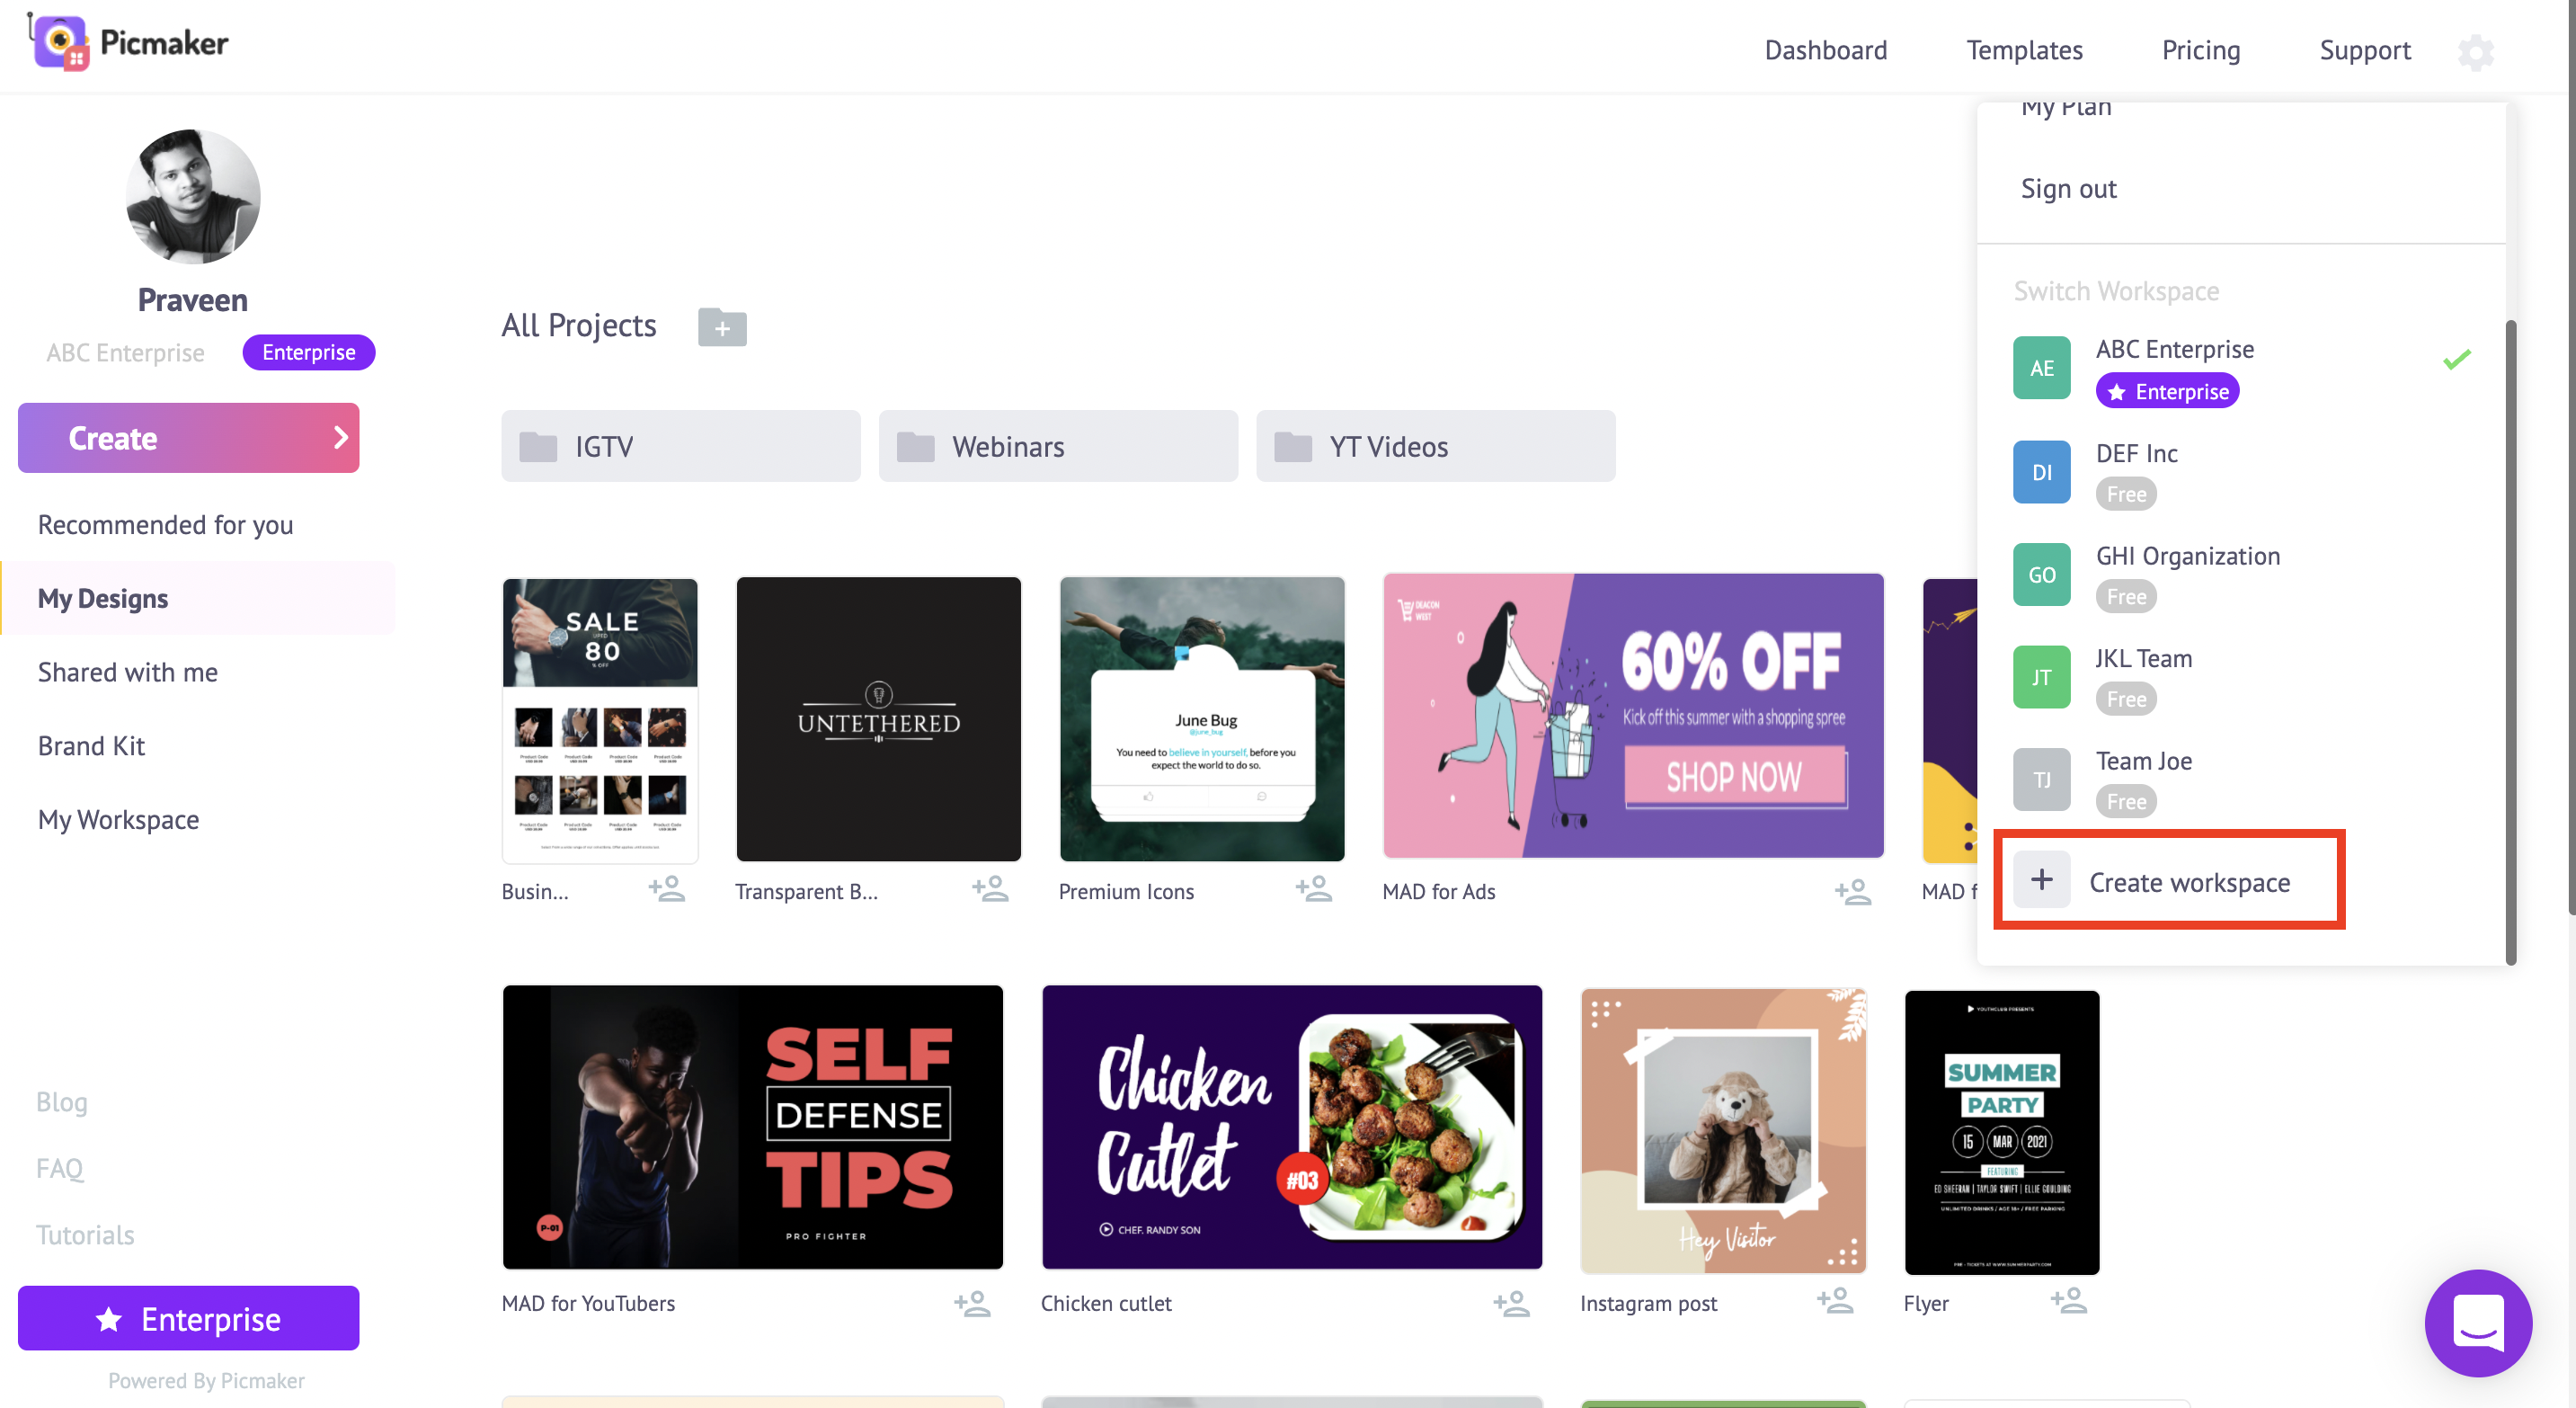
Creating a new workspace is as easy as eating an apple pie.
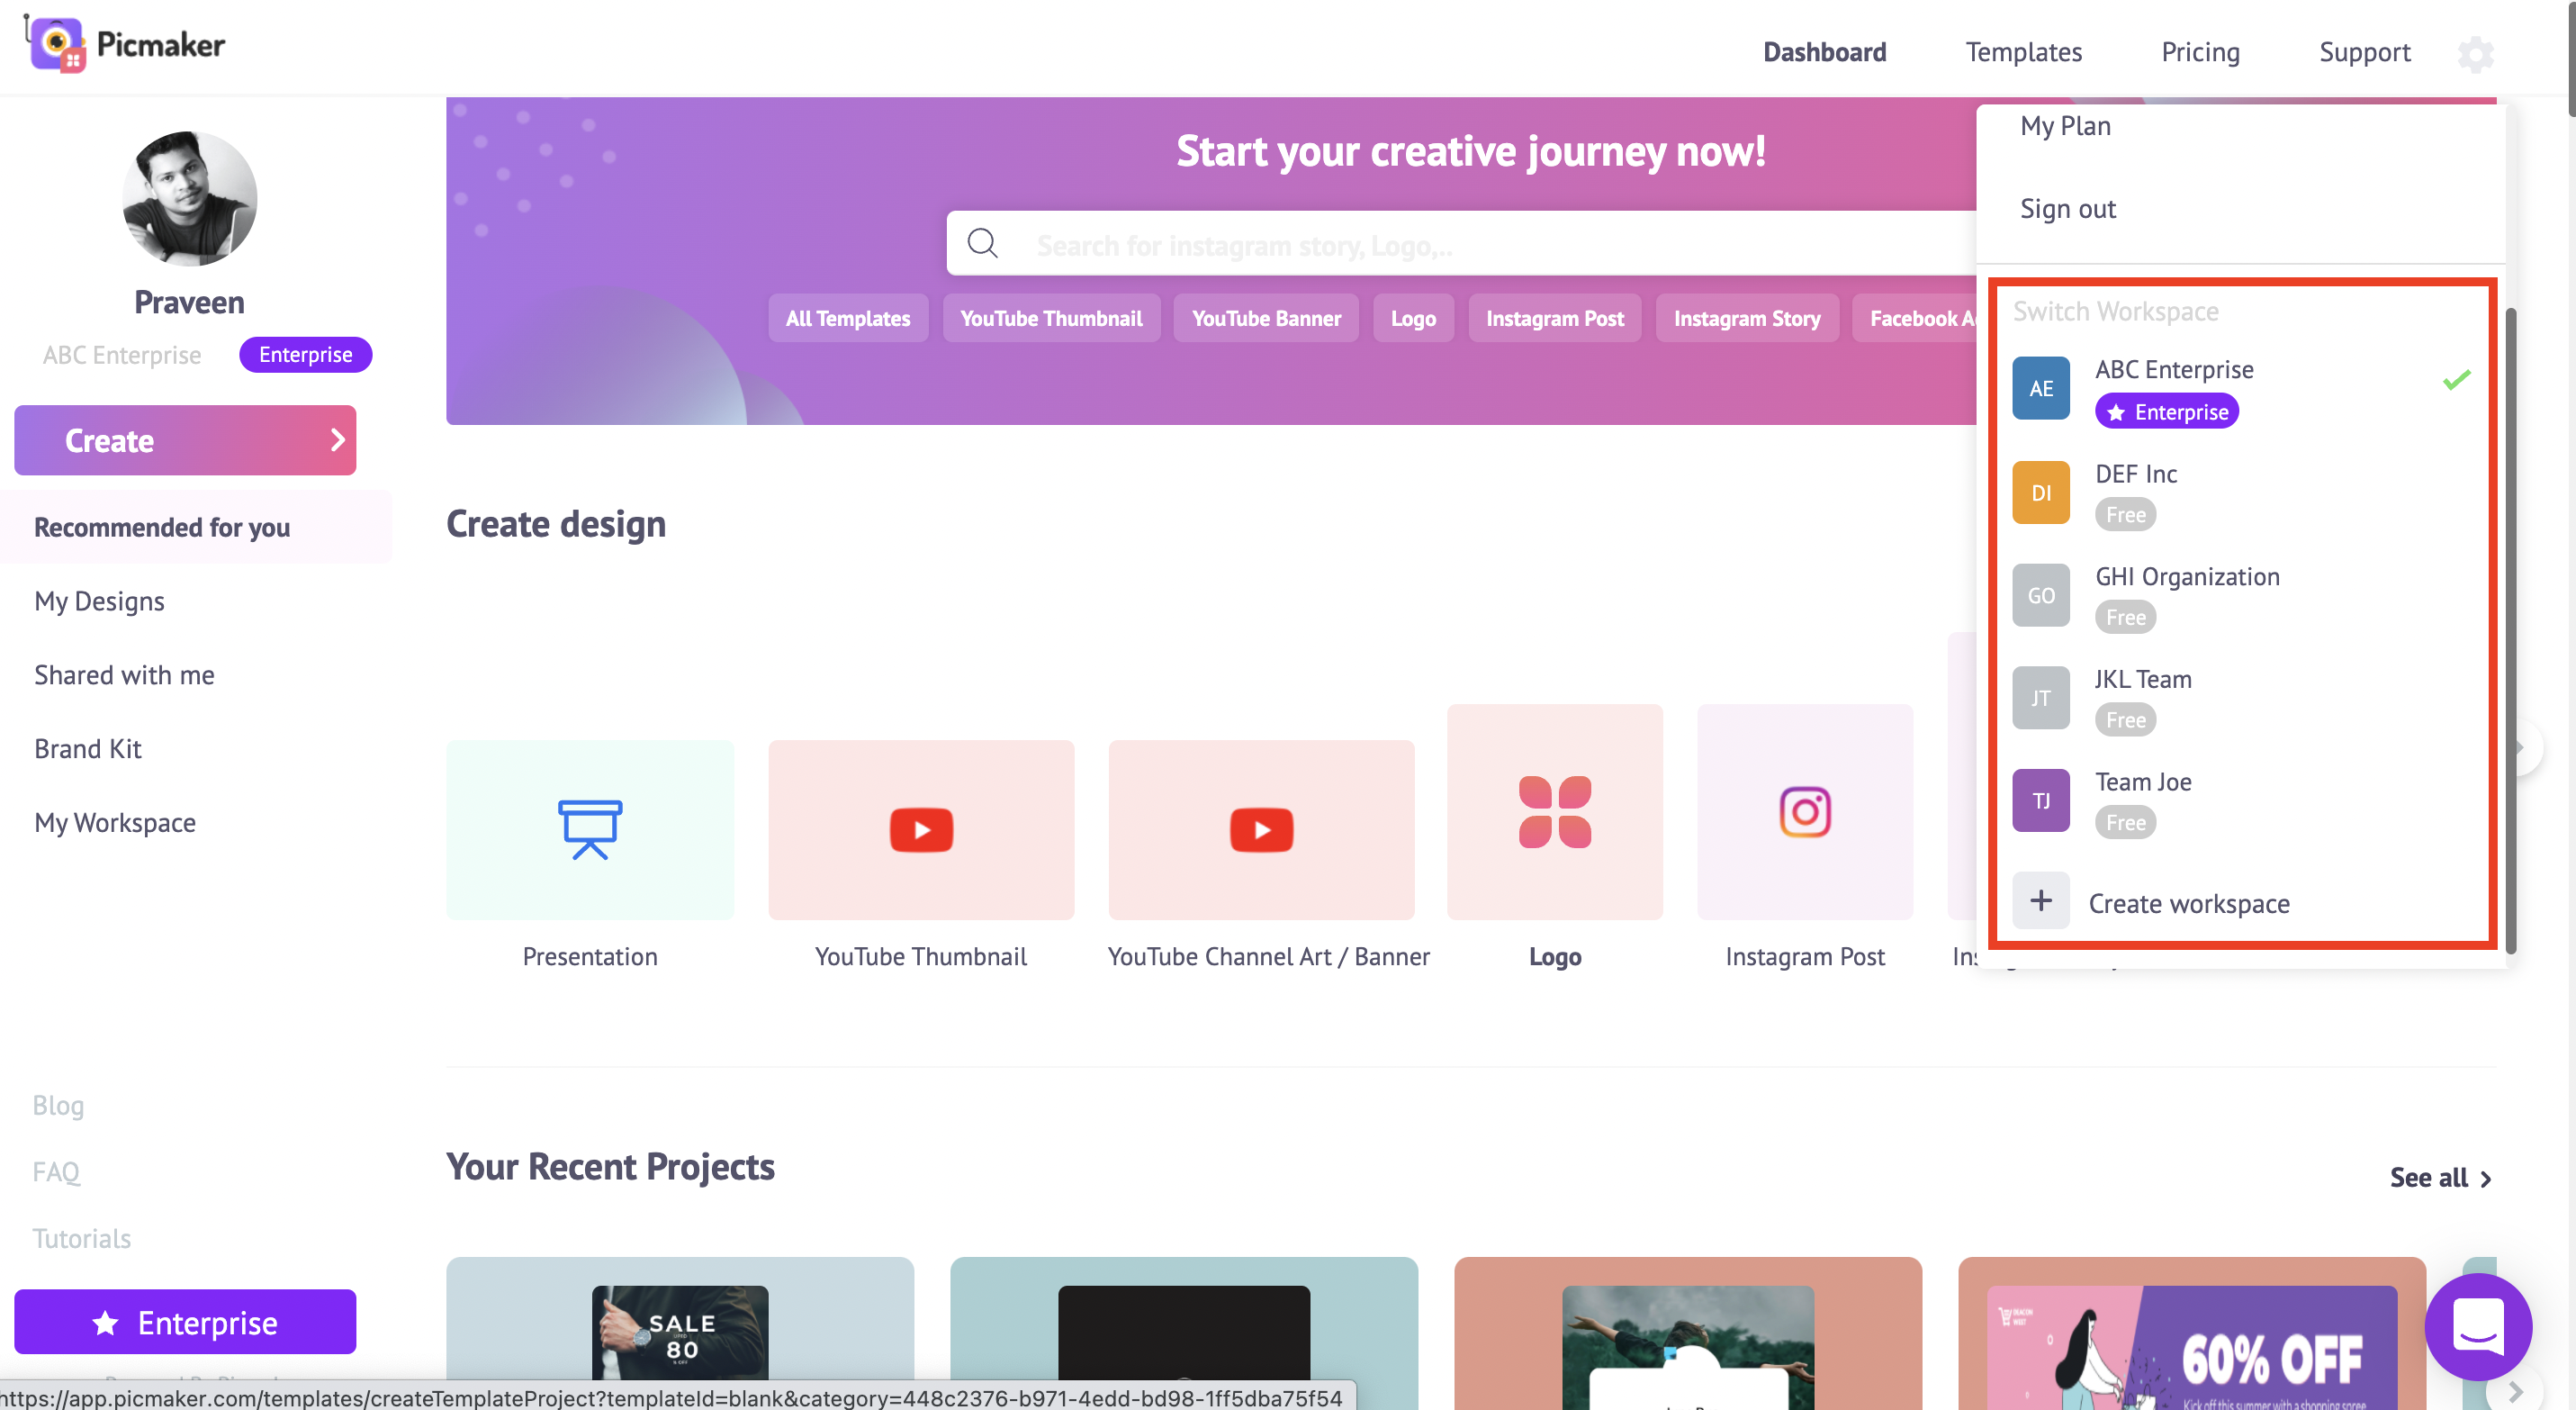
Click on the settings icon at the top right.
At the bottom, you will notice a plus icon with the text "Create Workspace".
Once you click on it, a new free workspace will be created.
You can change the name of the workspace and invite your team from here.
Besides, you can even upgrade individual workspaces to our paid plans. That way, you’ll never mix up designs for different teams, projects, and clients.
Switch between workspaces
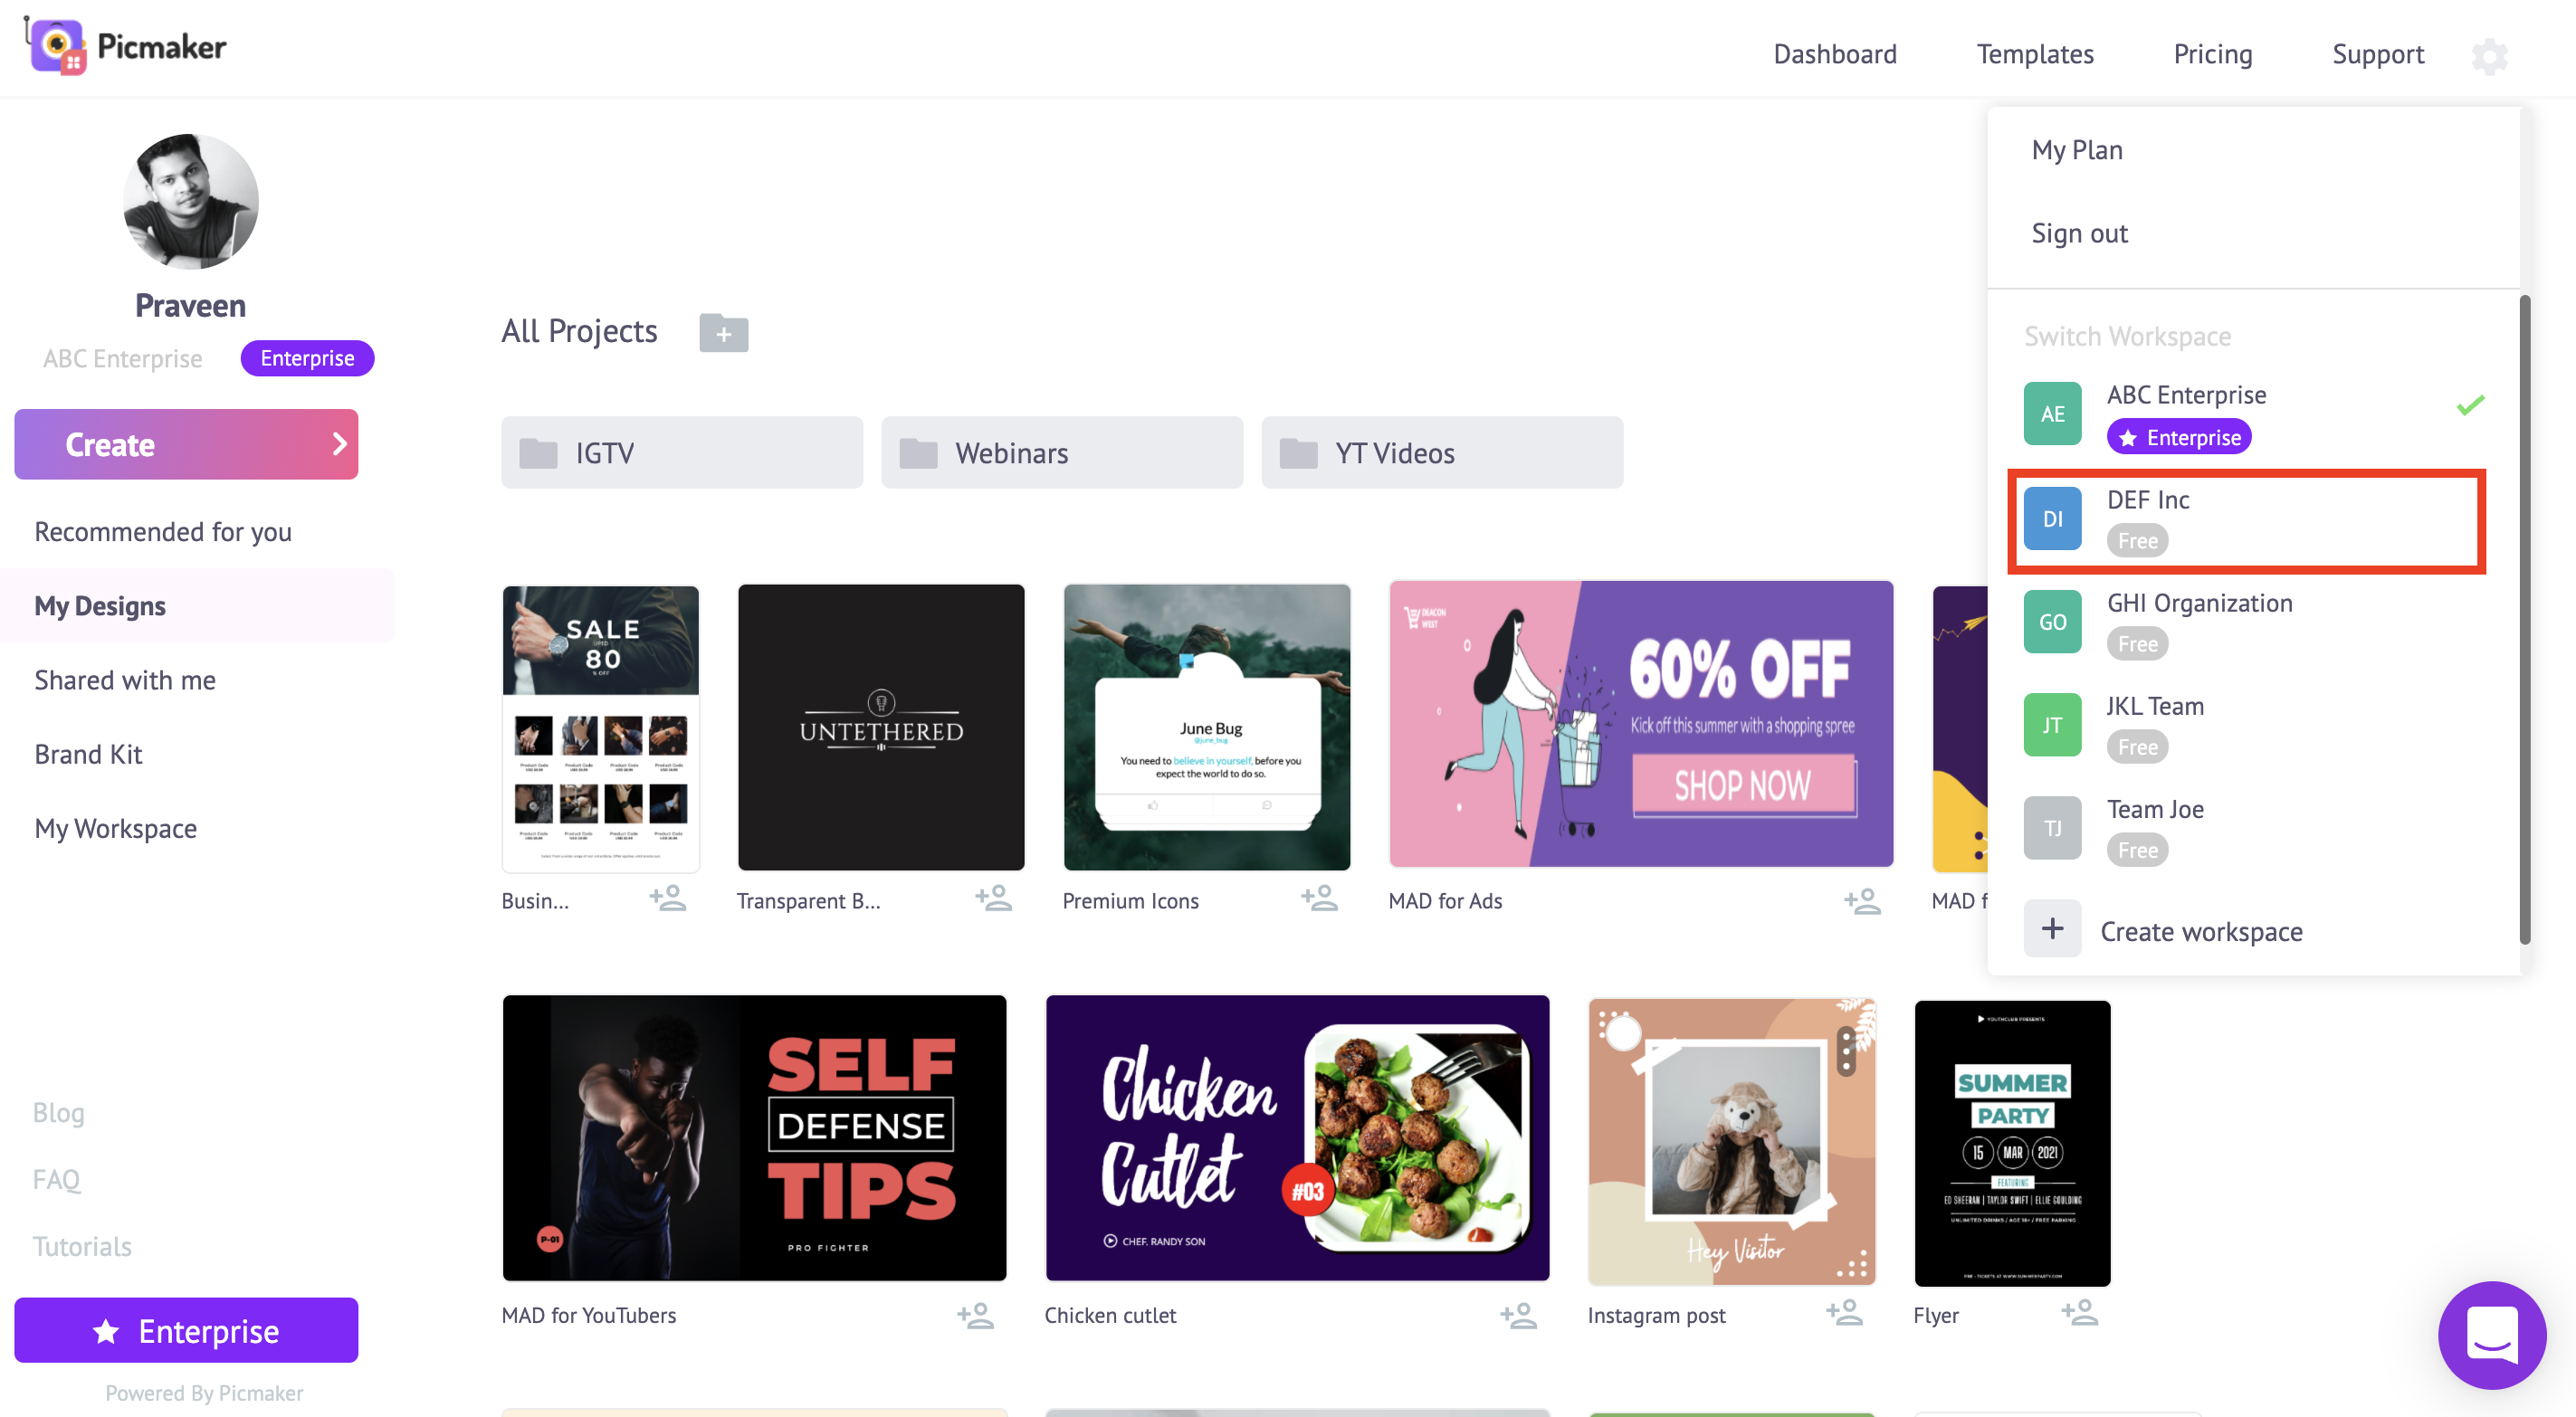
To switch between different workspaces, click on the settings icon again.
Choose the workspace that you would like to work on.
It's that simple.
In just a second you can cycle between different workspaces.
Upgrade a workspace to Starter or Pro Plan
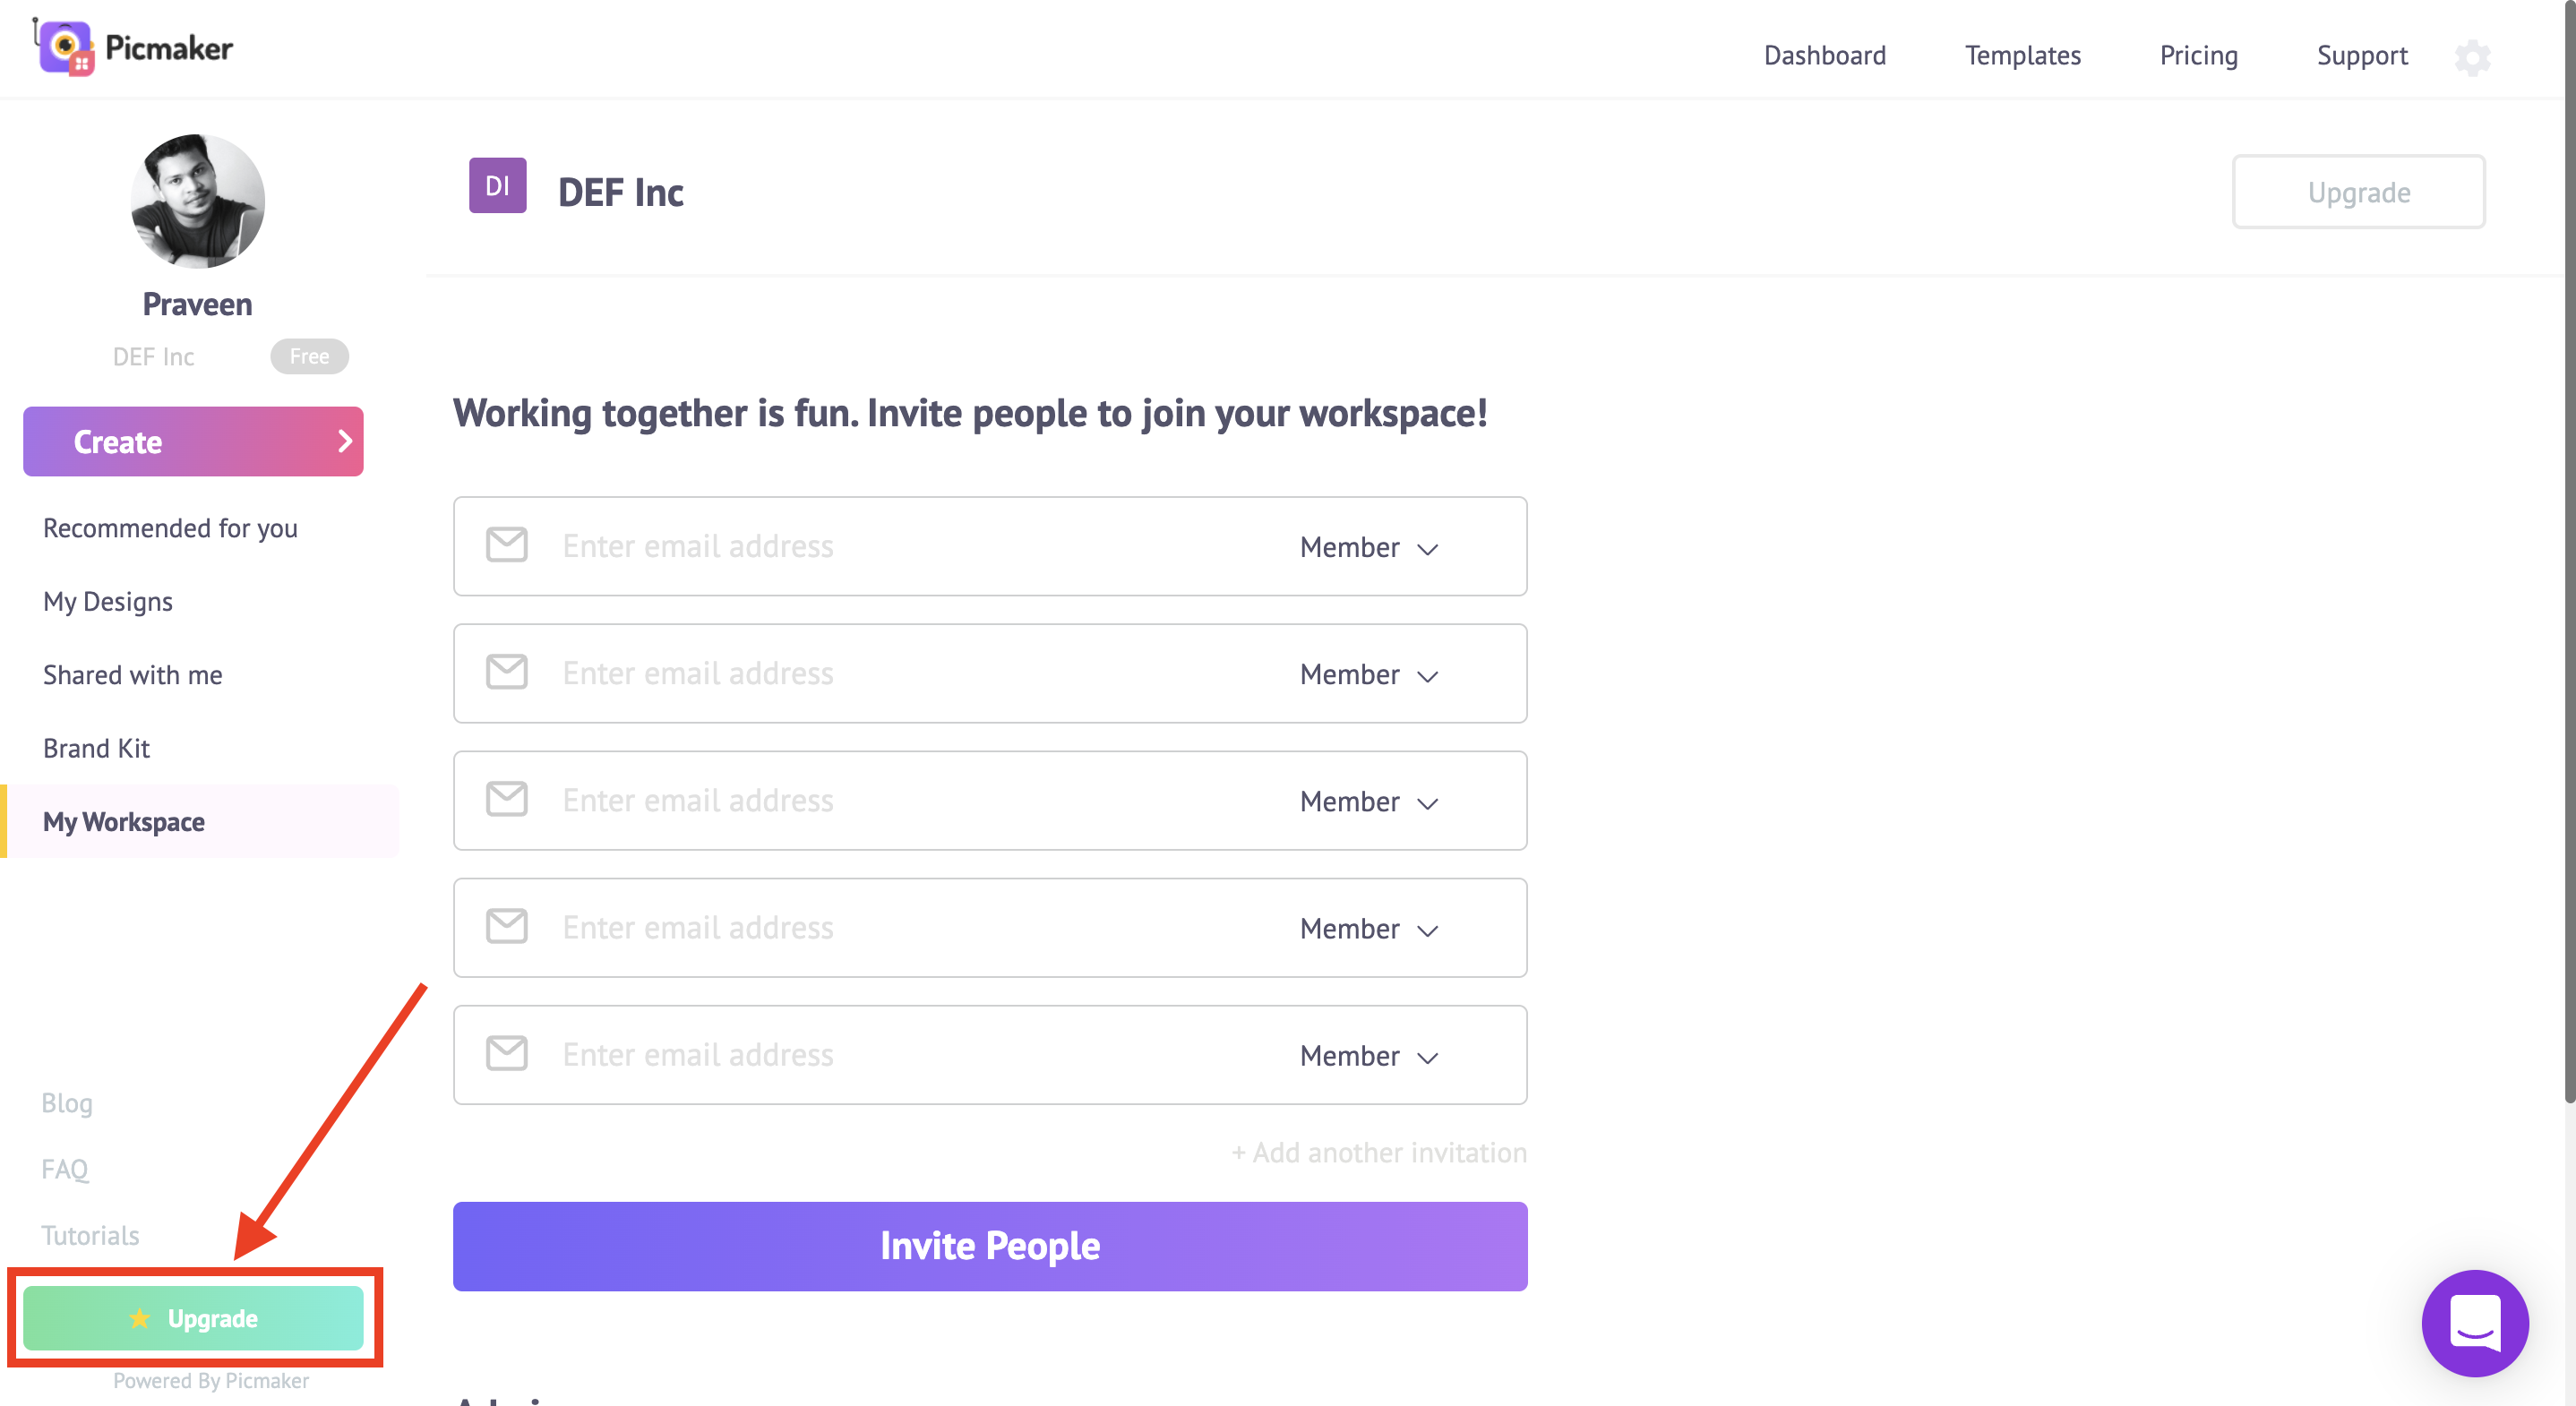
There are many ways to upgrade a workspace.
One of the easiest methods is by using the "Upgrade" button at the bottom of the sidebar.
In this pop-up, you can get a glimpse of the features you will get in a starter and a pro plan.
This side-by-side comparison helps you to decide between the best plan that matches your need.
This side-by-side comparison helps you to decide between the best plan that matches your need.
Collaborate Limitlessly
Why have all the fun by yourself?
With the help of Picmaker, invite your team, share the designs, and collaborate limitlessly along with multiple workspaces.
Also, check out the below tutorials
How to create unique designs in seconds using AI
15 Best Instagram Post Ideas With Images to Drive Huge Engagements in 2021

